Sunday, 26 February 2012
Double Chocolate Oreo Cake
Tomorrow my mom-in-law is celebrating her birthday. She is probably the very best mil in the world and I am so lucky to have her! I needed to make a very special cake for the occasion, one that would be elegant but fun, because that's just what she's like, a real lady who is full of fun, especially when it comes to her grandchildren! In deciding what to make I also had to consider the fact that it would need to feed the army of a family that we have, plus be appealing to the adults as much as it will appeal to the kiddies... Phew what a task! Then, it came to me....*light bulb*...while scrolling through Friday's Instgram pics, soooo many of the people I follow had posted these Birthday Oreo pics. South Africa is ALWAYS behind, and we don't get half the cool stuff you find everywhere else *sigh* so I guess you learn to deal with what you have...and I had normal, everyday Oeros! YEY! SOOOOOOoooooo I made an Double Chocolate Oreo cake. Ooooh!
I made a double mixture of this chocolate cake by Amanda from I am Baker as my "cake canvas", so it could stretch and make a 3 layer cake and cupcakes.
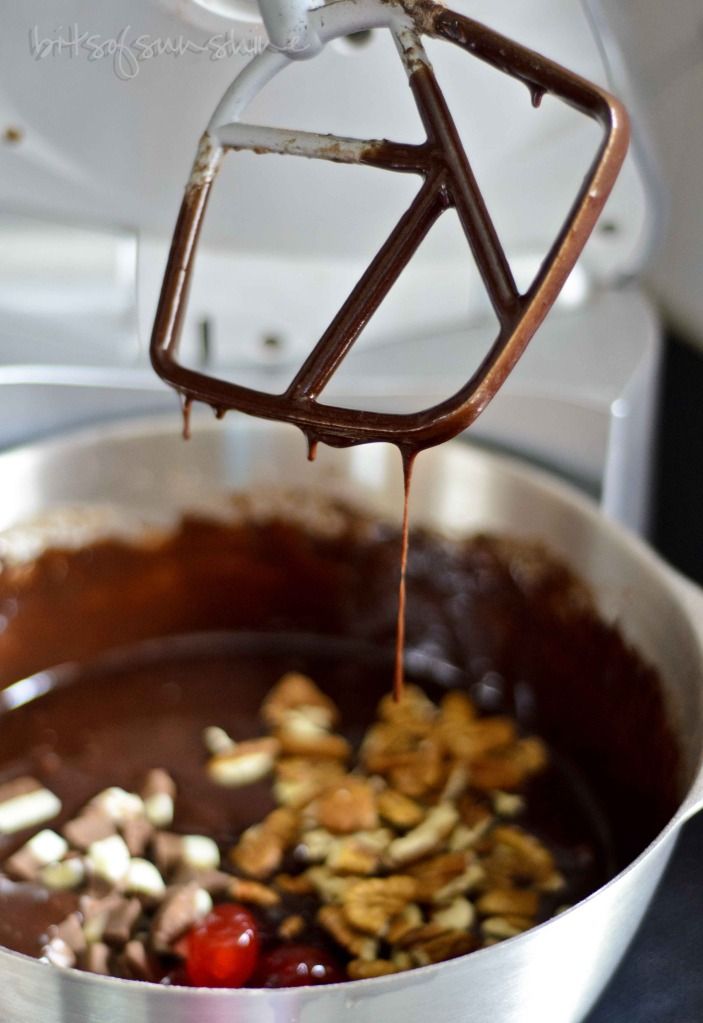
To this I added (of course I cant just do something normal) bits of hand crushed Oreos and chunks of milk chocolate (between the cupcakes (which I will post during the week) and the cakes I used 400g milk chocolate!!!!)
Excuse the missing top on this - I *had* to taste it :) This cake mixture makes the most divine cake! Its moist because of the buttermilk and almost black in colour because of the baking soda that reacts with the cocoa, a heavenly combo - for the eyes and taste buds!
I made a vanilla icing for this using my all time favourite recipe - 1kg icing sugar, 500g butter, a dash of milk where needed and a dash of vanilla essence. I added some more chunks of milk chocolate to this and added some Oreo crumbs (which I made by pulsing some Oreos in my processor).
Like I said earlier, I meant this to be a 3 layer cake, but in my Sunday-afternoon-state, instead of lining the tins (like I should have) I just sprayed them with Spray and Cook *wrong move* and because of the chocolate chips, one of the cakes stuck SO badly - so I crumbled it up and made some cake balls (will post some time!)
Icing this cake was nice and easy - thanks to its dense consistency! I did a thin crumb coat (essential *i think* when putting light icing on a dark cake) and then iced the rest of the cake with a thicker icing.
I had stacks of left over Oreos so I made more fine crumbs in my processor and covered the top of the cake in Oreo "dust".
I proceeded to finish it off with piping little star flowers in with my favourite nozzle, and added little black flowers. The contrast of the dark and light looked so elegant, but inside its packed with the "funness" of the Oreos. I think that sums up my mil! She is just like that!
I will post the cake balls (when they are finished - they are resting in the fridge as we speak - waiting for a good coating) and the cupcakes soon!
For the cake recipe, go check out I am Bakers Best Chocolate Cake
To this I added - 12 Oreos crushed by hand to make big chunks
About 150g *I think* of milk chocolate chopped up
For the basic icing
1kg icing sugar
500g butter
dash of milk
dash of vanilla essence
Combine the icing sugar and butter and beat until smooth and fluffy, adding milk when needed (teaspoon at a time!)
Add the vanilla essence to taste ( I love vanilla essence - I think i use about 15ml, but i am not sure!)
For the filling
I kept aside some of the icing and added about 100g chocolate chunks and some fine Oreo crumbs.
Enjoy!
Monday, 20 February 2012
Blueberry, Banana and Apple Bran Muffins
I often get asked where I find the time to bake. I work a full time job from 7.30 to 5.00, am as involved in my Church Fellowship as possible and still have to find time to clean my house and cook healthy meals - BUT I still manage to squeeze in time to bake! You can always find the time for the things you love! :) I love baking from scratch (I think it ALWAYS tastes better!) but having said that - I do stock a couple of Snowflaks Easy Mixes in my cupboard. They are divine and wonderfully easy! They (thankfully) have a couple of mixes like pancakes, flapjacks, variety of muffins, waffles etc. These are their Bran Muffins. All it takes is some oil, milk and eggs and you have a basic canvas on which to get creative! All the taste with very little effort!
I made up two packets worth of mixture and made up 3 batches of different flavoured muffins by adding bits and pieces to them. I added a cup of fresh blueberries to one, 1 1/2 mashed banana and pecan nuts to another and tinned apple and cinnamon to the last one.
and sprinkled soem chopped pecan nuts to the top - it just adds that bit of crunch!
To save on clean up time (which is most of the effort of baking) I like baking them in muffin holders - plus they just seem to look nicer in the holders when serving them...
They make such nice lunches! I usually bake them, eat some (ok! maybe more then some!) and pack the rest into Ziploc bags and freeze them so I have already prepared luch for those busy (or lazy) mornings!
Sunday, 12 February 2012
Chocolate Cupcakes with Fudge Icing
A dark, chocolaty, indulgent treat for Valentines day that will win the love of any chocolate lover! Worked on my husband! :)
So, how would you go about making these tasty little morsels? Well - simple and easy! First prepare two 12 hole muffin pans with cupcake holders and set aside. Then mix up some flour, bi carb, salt and cocoa.
Next, mix with an electric beater, eggs and sugar and vanilla essence... and then...
ONE CUP OF MAYONNAISE! Yes, you read right! Mayonnaise! Its basically made up of eggs and oil so it totally makes sense :) And add some boiling water (or a cup of freshly brewed coffee)...
I went the extra mile on these and added whole cherries, top deck chocolate and pecan nuts to give them a 'black forest' effect - worked like a charm!
Then pour the mixture into the prepared cupcake holders (the mixture may look a bit thin, like pouring consistency, but that means its perfect!) and bake for 20 min.
Then make some chocolate fudge icing (YUMMMMM!) and ice the little suckers!
I love the Wilton M1 tip, it makes such gorgeous swirls!
And there you have the perfect treat to share with someone special!
So I guess now all you need is the recipe!
Chocolate Mayonnaise Cupcakes
2 c flour
¾ c cocoa
1 tsp bi-carb (baking soda)
1/4 tsp salt
2 c sugar
2 large eggs
1 c full fat mayonnaise
2 tsp vanilla essence
1 1/3c freshly brewed coffee
Preheat oven to 180 degrees Celsius .
In a bowl, sift together the flour, cocoa, bi-carb, and salt.
In another bowl mix the sugar and eggs and beat until light and fluff.
Add the mayonnaise and vanilla and mix until combined.
Add the half the dry ingredients and mix until combined.
Add the freshly brewed coffee and beat at low speed.
Add the remaining dry ingredients and mix until smooth.
Full cupcake holders ¾ way full and bake for 20min.
(I added1 cup top deck chocolate, 1/2 cup cherries and 1/2 cup chopped pecan nuts to this )
Chocolate Fudge Icing
250g softened butter
500g icing sugar
dash of vanilla essence
dash of cream / milk
100g melted dark chocolate - cooled but still runny
In an electric mixture, mix butter and icing sugar until smooth and fluffy, adding the milk bit by bit until a nice smooth piping consistency is reached.
Add the vanilla essence and mix a bot more
While the mixer is running, slowly add the chocolate and beat.
Wednesday, 1 February 2012
No Bake Cheese Cake
I love cheese cake. Every year when my birthday rolled around, I would ask for a cheese cake. There is just something so indulgent about the creamy tang that totally appealed to me. Still does! I have found in my years of devouring cheese cake that there are two definate types of cheese cake lovers...the "Baked Cheese Cake"lover and the "Fridge Cheese Cake" lover. I am the latter. I will enjoy a piece of baked cheese cake, but not nearly as much as a fridge cheese cake with berry sauce drizzled over the top.
So here is my version of a no bake cheese cake. It takes about 20min from whipping to placing in the fridge to set, but the setting takes a while. I know how hard it is to not tuck into your baking as soon as the reccommended setting time is up - but if you can wait it out - this is even better the next day and even better the day after that - but it ends there!
All it takes is a biscuit base ( I use Tennis biscuits - the cocount in them gives such a nice crunch!), some cottage cheese, condensed milk, lemon juice, whipped cream and gelatin (I use the powder type that come in sachets, its cheap and easy to use)
So first you make the biscuit base and set in the fridge. Then whip up the cream. Then in a new bowl mix the cottage cheese, condensed milk and lemon juice...
Then add this mixture into the whipped cream. Now is the part I hear most people freak out about - the GELATIN. Its not as scary as you think! All I do is measure out 60ml of hot water in a mug and add the gelatin to this and stir it until its dissolved. NO biggie! Then fold this into the cream mixture. EASY! Now its ready to be poured over the crust and left to set in the fridge. I always lick the bowl clean. Its irrisistable!
I usually just make one large one, but on special occasions, like this :), I made it layered in shot glasses. A shot of cheese cake! MMMMmmm! Divine!
Download the recipe card here for a high res pdf (or simply right click and print the jpeg below!)
So here is my version of a no bake cheese cake. It takes about 20min from whipping to placing in the fridge to set, but the setting takes a while. I know how hard it is to not tuck into your baking as soon as the reccommended setting time is up - but if you can wait it out - this is even better the next day and even better the day after that - but it ends there!
All it takes is a biscuit base ( I use Tennis biscuits - the cocount in them gives such a nice crunch!), some cottage cheese, condensed milk, lemon juice, whipped cream and gelatin (I use the powder type that come in sachets, its cheap and easy to use)
So first you make the biscuit base and set in the fridge. Then whip up the cream. Then in a new bowl mix the cottage cheese, condensed milk and lemon juice...
Then add this mixture into the whipped cream. Now is the part I hear most people freak out about - the GELATIN. Its not as scary as you think! All I do is measure out 60ml of hot water in a mug and add the gelatin to this and stir it until its dissolved. NO biggie! Then fold this into the cream mixture. EASY! Now its ready to be poured over the crust and left to set in the fridge. I always lick the bowl clean. Its irrisistable!
I usually just make one large one, but on special occasions, like this :), I made it layered in shot glasses. A shot of cheese cake! MMMMmmm! Divine!
So...Whats your favourite cheese cake - Bake or no Bake?
Download the recipe card here for a high res pdf (or simply right click and print the jpeg below!)
Subscribe to:
Posts (Atom)


