carlasconfections test: June 2012

Tuesday, 26 June 2012

Cute As a Button Butter Cookies


Hi, my name is Heidi and I am addicted to Pinterest. How many of you just opened a new tab to check on your boards? Yip – that would be me! In fact, my morning routine is pretty much get to work, have a sip of coffee,  open my browser and gawk at all the new pins! And then I check mail, and THENmy day begins. If you have never heard of Pinterest, tsk tsk, go and have a look! I PROMISE you will find something there to inspire you! My boards are expanding at an alarming rate, I started off with one food board – but it needs some serious splitting! Go and check it out if you have some time to kill, but beware –  you may never leave! If you are a regular Pinterest Junkie (and you totally identify with me), leave your Pinterest username in a comment  – I would love to follow your boards! 


And that brings me to these:


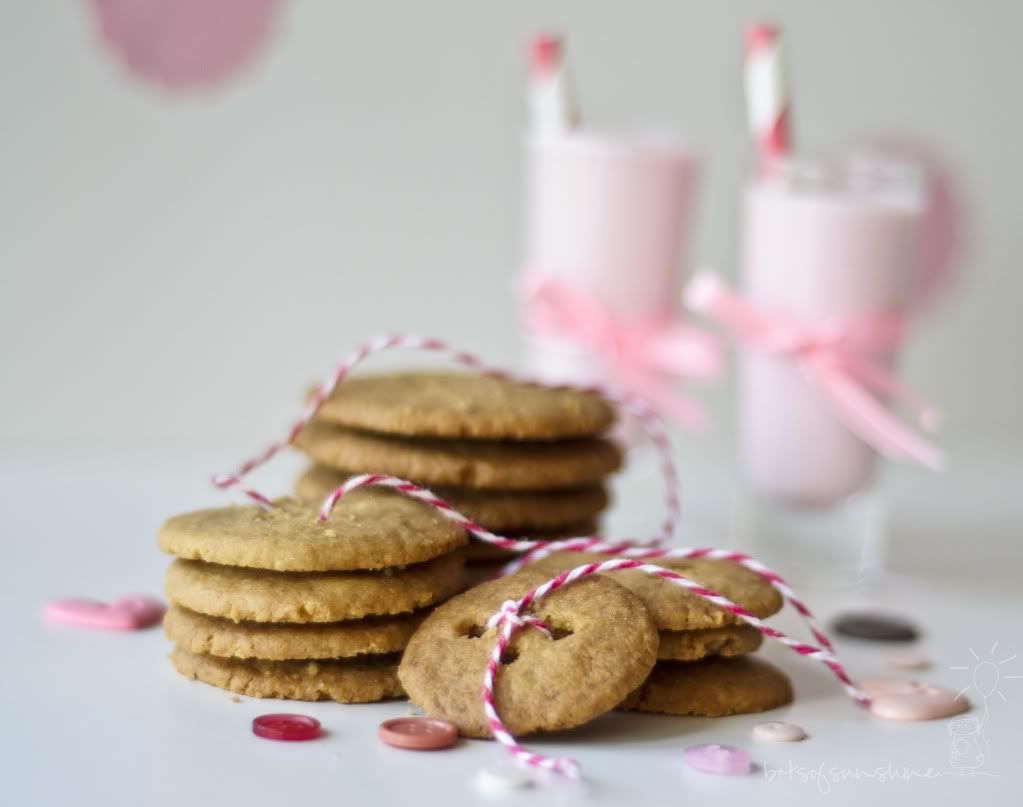
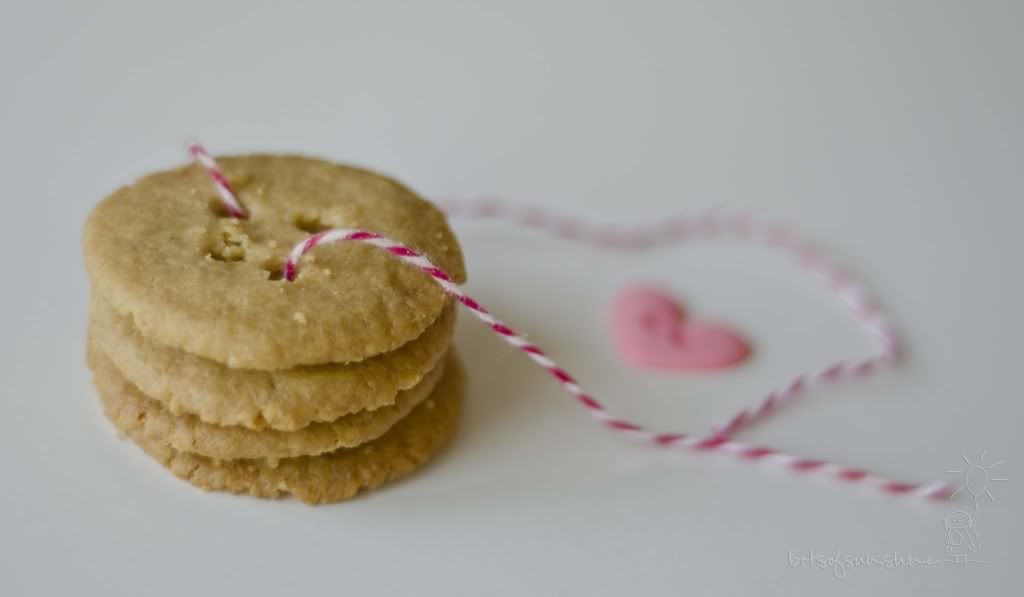
Aren’t they just as cute as a button! I had seen similar cookies somewhere, unfortunately before my days of pinning started, and I fell in love with the idea of button-like cookies.  I searched for the blog where I had originally seen them and just couldn’t find it, it made me realise how Pinterest has made my life so much easier! (I did eventually find a similar one and pinned it) Ino longer have the need for 1000s of book marks anymore, I now have a couple boards I can access from my computer, iPad or iPhone – all in pictures (let’s face it – most of us bakers are visual people!)Yey! On that topic, I have recently discovered Flipboard for iPad (thank you Dine and Dish for this post), if you are into facebook, instagram or twitter – this app is AWESOME! It makes a “magazine” layout of all the people you follow and their most recent posts – it also incorporates google reader making it easier to keep track of all the blogs I subscribe to. Just thought I would let you know!


Anyhoo – Back to the cookies! My friend, Kirsten gave me this recipe and she got it from a guy called Trevor, you have to know when a guy passes on a recipe it has to be good! So I gave it a shot, and I had wanted to try out the button technique for a VERY long time, so I took the opportunity! They are made with butter, brown sugar, cake flour, corn flour, baking powder and vanilla essence – EGG FREE – so you can munch on dough in between baking and these would make really yummy cookie dough bites or pops! First up there is some creaming and mixing

...and rolling


 and flattening


and punching little holes (a drinking straw would be ideal – but a cake pop stick was all I had!)


And baking and cooling and munching! My other friend, Nicola said something very true about these cookies: they are so good; you want to eat them like chips! Yip – that just sums it up!


 Besides being super cute, they are scrumptious – they are soft and yet crunchy and full of flavour from the brown sugar! The best thing about them is you can add all sorts of goodies to them, like cranberries, or chocolate chips or pecan nuts…the list could go on and on… I am sure if you checked on Pinterest there will be someone with a board called “Cookie Additions”!  As I said earlier – go and check Pinterest out – you will LOVE it, if you would like an invite to get your own boards going, just send me your email address and I will send you and invite, or if you already have boards of your own, please leave your username in a comment – I would love to follow your boards!

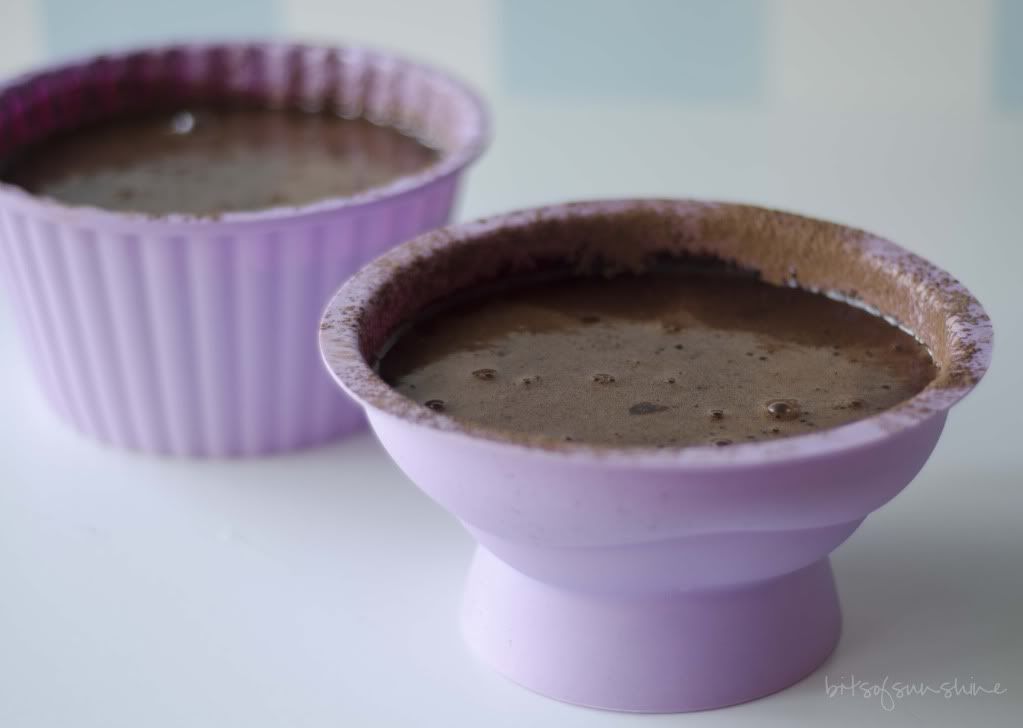
PS - I made a super quick peach crumble with some of these cookies by placing some tinned peaches in a bowl and crumbling some cookies over it and served with a dollop of ice cream – super yum!

Cute as a Button Butter Cookies:
Make about 55 cookies
250g soft butter
250ml golden brown sugar
5ml vanilla essence
500ml cake flour
125ml corn flour
5ml baking powder
Pinch of salt

  • Cream the butter, sugar and vanilla essence together until light and fluffy
  • Sift the cake flour, corn flour, baking powder and salt into the creamed mixture
  • Mix until a soft dough is formed
  • Roll into balls and flatten with your hand
  • Place and a greased or lined baking sheet and poke 2 or 4 holes in each cookie with a drinking straw
  • Bake at 160 degrees Celsius (320 degrees Fahrenheit)  for 15 – 20 min or until pale beige – do not allow them to brown
  • Allow the cookies to cool for a couple of seconds before removing from the baking sheet

I was so stoked to be nominated for the Food Stories Award for Excellence in Storytelling by Lynna from Hearts in my Oven  (its such an awesome blog with tons of wonderful recipes - go and check it out - I am sure you will love it!) Thanks so much Lynna, you are so sweet! Part of the nomination process is that I have to say one random thing about myself in this post, and there are so many random things to say...so here is the most random - I bring my little Yorkie, Daisy Dog, to work with me everyday - She loves it at work, in fact, she squeals whenever the car pulls into work and tears into the office to greet everyone. It takes here about 15min to settle down. She is co cute. She makes up for my lack of excitement (har de har har). Here is my little pooch:


Now its my turn to nominate!

These nominations are blogs I REALLY enjoy:

Dine and Dish -Kristen always has awsome posts on life, baking and cooking and stuff in general
Bake your Day - Cassie has awsome posts, she also has a great series called Wednesday Ramblings
Carlas Confections - Carla's posts are always so much fun! She has started a new series called Fresh Fridays with healthy recipes - good for us baking bloggers!!!
Dessert for Two - one of my favourite blogs - Christina is such an interesting person and always has wonderful posts and stunning photos!

    Wednesday, 13 June 2012

    Giant Chocolate Cupcake and Giveaway!

    Thank you for dropping by Bits of Sunshine today (",) you absolutely chose the right time because, together with Carla of Carla's Confections, we have an awesome giveaway for you!


     If you have been following my blog for a while, you may have noticed my slight obsession with cupcakes - both the edible and non-edible kind. I really like cupcakes and I like to surround myself them; with making them, and buying charm necklaces for me and my friends. I assure you, its not because cupcakes are the latest fashion (although it made it so much easier to find cool decorations and molds) but because they are so cute and sweet and wonderful, not to mention versatile and easier to pipe pretty little swirls on top of then a cake. I am always feeling that I am in need of practice with decorating, so a while ago I was combing through the CRAZY Wednesday Auctions on Bid or Buy (we wont speak about that obsession now) and I happened to noticed a GIANT SILICONE CUPCAKE MOLD. Yes, giant,  x25 bigger than a regular sized cupcake - I was SOLD the second I laid eyes on it; another cupcake to add to my collection! Sweet! And I was the only bidder (even better!). A couple clicks and it was mine! Then, a couple weeks after that, I got a second giant silicone cupcake mold with my silicone-ware subscription. They must have known how much I loved cupcakes because it wasn't even on the "coming soon" list! But seriously - I am sure I will only have one giant over at a time for tea and cake; two will never fit into our tiny home, so I have decided to host this giveaway! But more about that at the end!


     As cool a concept as a giant cupcake is, I felt oddly intimidated about baking such a "big" cake. The top half (the part that is suppose to be the frosting of the cupcake) seemed to be a bit more on the "normal" size, but the bottom half is pretty deep so I did a bit of research (neither mold came with a recipe) to see which type of cake would work best, how long such large cake would take to bake properly, etc, and nothing concrete turned up. I made the decision to just dive in head first and make a cake I knew tasted great and just adjust the baking times. I used this recipeby Amanda from I am Baker and just doubled it. It is by far the best chocolate cake recipe I have ever made, I make it all the time now and even use it to make regular size cupcakes! All the ingredients for the cake are things most of us have in our cupboards, all except buttermilk (well at least for me anyways) and since I am usually a bit on the lazy side, I just make my own using 1 teaspoon of lemon juice to one cup of whole or low fat milk. All you do is measure out the milk in a clean jug or cup and add the lemon juice and wait a couple of minutes (be patient) and the milk will curdle slightly -  works like a charm!


     Whenever baking ANY cake - I always sift the dry ingredients into a bowl and then stir them together with a metal spoon, it helps to evenly distribute the dry ingredients through the mixture with minimal folding /mixing and it makes the outcome of the cake more reliable.


    I mentioned the "every day" ingredients earlier, but if you are anything like me, I like to know what they are so I can see the level of work that goes into the mixture - it takes all purpose flour, white sugar, cocoa powder, baking soda, baking powder, salt, buttermilk, vegetable oil, eggs, vanilla essence/extract and freshly brewed coffee (or just plain hot water if you dislike coffee, but you really don't taste the coffee - I promise!)  This is the ultimate combo for a moist (thanks to the oil), dark (thanks to the cocoa and baking soda), soft (thanks to the buttermilk) rich, yummy cake!


    Some of the silicone manufacturers claim you can use silicone bake ware without greasing it and without dusting it with flour, but I just can't bring myself to take the chance - I can't imagine putting all the work in and having the cooled cake stick to the silicone and break up - NIGHTMARE! Call me extra careful - but I usually just give the silicone a quick spritz with some "Spray and Cook" and if I am being extra, extra careful, like for this post (yes you guys are that important!) I dust the silicone too! For chocolate cakes I like to dust the pans with cocoa instead of flour.


    After filling the pans I placed them on a baking tray, and popped them into a pre-heated (180'C / 350'F) oven and let the games begin! I waited at least 35min before doing my first inspection. If you open the oven door in the first 15 minutes of baking, your cake is more likely to turn out flat, so I just doubled that figure and hoped for the best! (",)

    The top half of the cupcake probably took about 45 minutes before a cake tester came out clean, and the bottom half took almost double that! I took it out about about 40 minutes after the top half! Phew - LONG baking time! Good thing it was a chocolate cake, or I am sure the top would have been very brown! Anyways - I let them cool COMPLETELY before turning the mold upside down. And it was worth all the extra precautionary measures. (",) They just slipped out of the mold! No sticking, no panicking and no tears! Thank goodness!


    I decided to go all out on this one and try another daring feat - caramel frosting - the type where you have to melt sugar on the stove stop! And I was pleasantly surprised at the out come! I used a recipe from my very sweet friend, Carla, who has agreed to share her caramel frosting recipe for this post on her blog today, with photographed steps to take all the fear out of this frosting!! The frosting is not as hard as you may imagine, and it tastes really, really good! So go and check her post out here, you will need to do this as part of the giveaway.

    This is quite a LARGE amount of cake!I doubled I am Bakers recipe and used 1 1/2 of the batter for this cake. The bulk of it being in the lower half of the cake. The other half I used to make these regular sized cupcakes. I decided to add some frosting to the middle of the "cupcake holder" make sure there was enough of a cake:frosting ratio, so I sliced the bottom half in two.


    Just for fun I tried two different frosting styles:


    This one I did all in (Wilton M1 nozzle) roses. Please excuse the messy roses! I am Baker has a wonderful video tutorial on how to pipe these roses here.

    For the second one I did this:


    I used an offset spatula to smooth the top, and and Wilton M1 nozzle to make the roses and "stars"). For the cupcake holder effect I used a piece of card board and cut one side of it with a zig-zag edge craft scissor and used it like a cake scraper, worked pretty well. (",)

    SO! I hope I have un-daunated this cake and Carla has done the same for the frosting...well enough to make you wish you had a GIANT CUPCAKE mold of your own! And here is your chance... Like I said, I have two, and I certainly don't need two! So I would love to give ONE away, you know, spread a bit of cupcake love!!!!


    This mold is pretty snazzy in that it has that top section that you can use when you are baking the "bottom" half of the cupcake, it has a dented section in the middle which will leave room for a filling once it is baked, and its an optional feature which you can use if you like!
     
    THE GIVEAWAY NITTY GRITTIES:
    • This give away is for ONE (red) giant silicone cupcake mold (3 piece)
    • To get started log into the raffel copter widget using your email or facebook account, there will be further instructions after that in the widget.
    • You can have a total of 6 (2 are mandatory) entries to win by:
                1. Leaving a comment here (mandatory)
                2. Following me on twitter @heidihawyes(optional)
                3. Becoming a fan of my facebook page(optional)
                4.Leaving a comment on Carla's Confections (mandatory)
                5. Following Carla's Confections on twitter @cwconfections(optional)
                6. Becoming a fan of Carlas Confections facebook page (optional)
                
                If you already follow on twitter or are a fan on facebook, thats awesome! You can still
                use this to gain the optional entries by leaving your name in the raffel copter widget under 
                the appropriate headings. 
    • Entries close on the 19 June 2012 and winner will be announced on 20 June 2012
    • Winner will need to contact me via email within 48 hours after being announced or another name will be drawn
    • This give away is international - so anyone my enter.
    • Thank you for entering and Good luck!
    Congrats DIANNA BEE! Rafflecopter picked your entry no 8 (liked Bits of Sunshine Facebook Page) please contact me on heidi@bitsofsunshine.com so we can arrange delivery!
      Enter here:

      a Rafflecopter giveaway

        Neither Carla, nor I are being compensated in any way for this giveaway.

        Tuesday, 5 June 2012

        Monster Party Printables

        A while back I was asked by one of my friends to make a cake for her GORGEOUS little boy who was celebrating his first birthday! I was super excited when she said it was a blue and green monster theme! She gave me a picture of one of Bakerella's Pop Stars who had made a similar cake in orange with cake pop eye balls - so I went out straight away and purchased a grass nozzle! The cake turned out really swell, and was easier then you would imagine (after I got the technique right)!


        I think its the sweetest theme ever! I have uploaded printable pdf's in A4 (ready to print out on a regular printer), download them here:

        Monster Cupcake Flag Topper
        Monster Invite

        Enjoy!

        Monday, 4 June 2012

        Chocolate Whisper-Filled Cupcakes

        I really love cupcakes! I am sure if you follow my blog you may have noticed that! There is just something extremely delightful about a personal treat. I think its even MORE delightful that you can add ANYTHING to the basic batter and create the PERFECT breakfast lunch dinner treat! I recently bought a big bag of Cadbury Whipsers (and I am very gratefull for my American translator :) Carla from Carla's Confections who translated these into Whoppers for all my U.S readers) and had no real purpose for them, so when I started working on a REAL cool give way ( that will be unveiled next week - yey) I had some extra chocolate cake batter left over that I decided to turn into cupcakes, and had the brilliant idea to add some Whispers to the batter before baking....


        The results were AMAZING! The cupcakes were dark and rich (yum) and the chocolate part of the Whispers had melted and gone all gooey *swoon* and the malt part had gone soft and, well, just totally amazing... need I say more?

        I had made some Caramel Frosting for THE AMAZING GIVEAWAY next week, so I used some of it on these cupcakes - wow! The combo of Chocolate, with malted chocolate balls AND caramel....mmmmm, just delish! Anyhoo - as I mentioned, Hazel was with me and was super keen to learn to do the "M1 Twirl" - and since there is hardly anything to learn about it -I gave her a quick example and let her take over the "bag"


        If you have always wondered how bakers got that fantastic twirl, or made those divine roses - REALLY its in the nozzle - and its super easy!


        Hazel did a really awesome job! Well done <3 Then we topped them with a chocolate whisper "cherry" and added a few pearl sprinkles just to make them extra pretty!


        P.S - thanks for the wonderful day Haz!

        BUT thats not all folks :) I have one last thing to share with you - ok maybe only two of you...I made these really cute tags to go with the treats I give away and I would love to make you a set for you to give away with your treats. If you leave a comment here letting me know what your fav "addition" to your cupcakes is you will be entered into the GIVEAWAY to win a 2 sets of 100 tags (so 2 people will each win 2 sets (2 different custom designs of your choice, logo etc). For additional entries you can follow me on twitter @heidihawyes or on instagram @bitsofsunshine, and because my sweet translator is always providing me with extensive translations (she once even sent me some peeps so I could taste them) you can get additional entries by following her on twitter @cwconfections or intstagram @carlasconfections. IF YOU DO ONE OF THE ADDITIONAL ENTRIES or if you ALREADY follow me on twitter/instagram just leave a comment saying so!


        P.S - I wont leave you stranded without this recipe...I will share the cupcake and frosting recipe next week!!!

        So...What do you add to ZUZZZ up ur cupcakes?

        WELL DONE TO THE WINNERS:
         1 - Laura of Tide and Thyme
        2 - Sana

        Please contact me heidi@bitsofsunshine.com so we can discuss your artwork for your tags!


        a Rafflecopter giveaway
        Blogging tips