
Ok - so that was my apology - I will try not be so "absent" next time! Thanks for being so understanding :) Here is what I have been dying to share with you guys over the last two weeks - sausage rolls.

These very the very first "savoury" bake my mom ever taught me to make. They are kind of special to me! This recipe is totally a made up one - finely tweaked to make what I think is the perfect sausage roll.

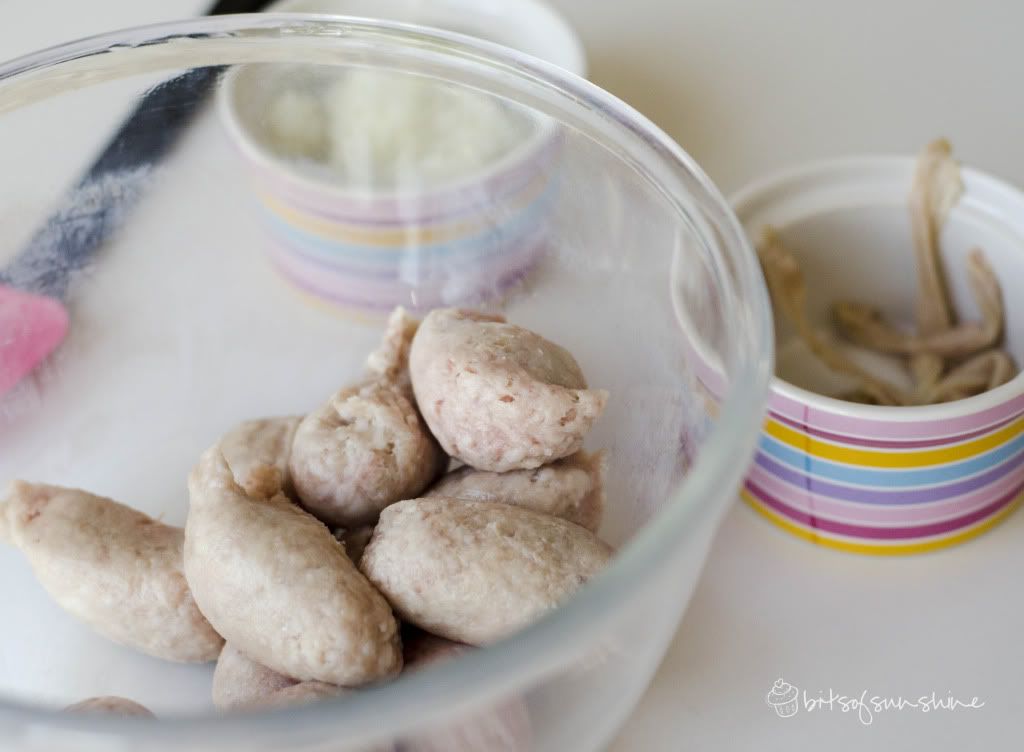
It starts off with 6 porkies! I have seen a couple of bloggers using like a big roll of sausage meat (not individual sausages in their little skins) but we don't get that sort of thing here! If you do - its about 375g of pork sausage meat. But if you are like me, you have to go pop these little guys out of their skins.
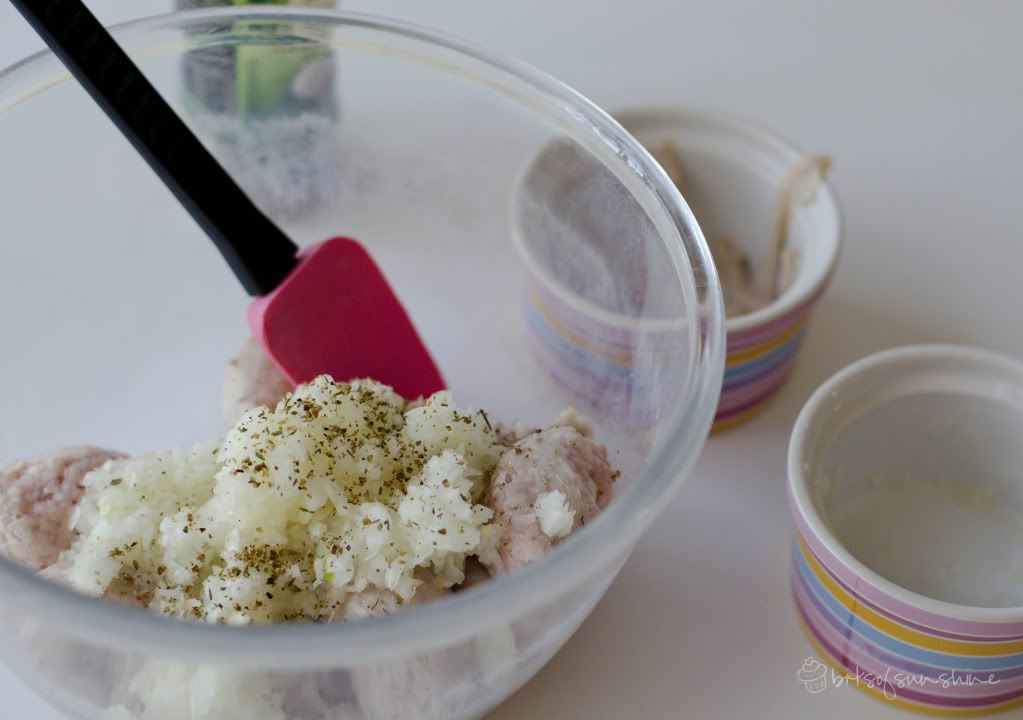
And then let them get cozy a *very* finely chopped onion and some mixed garlic and herb seasoning.
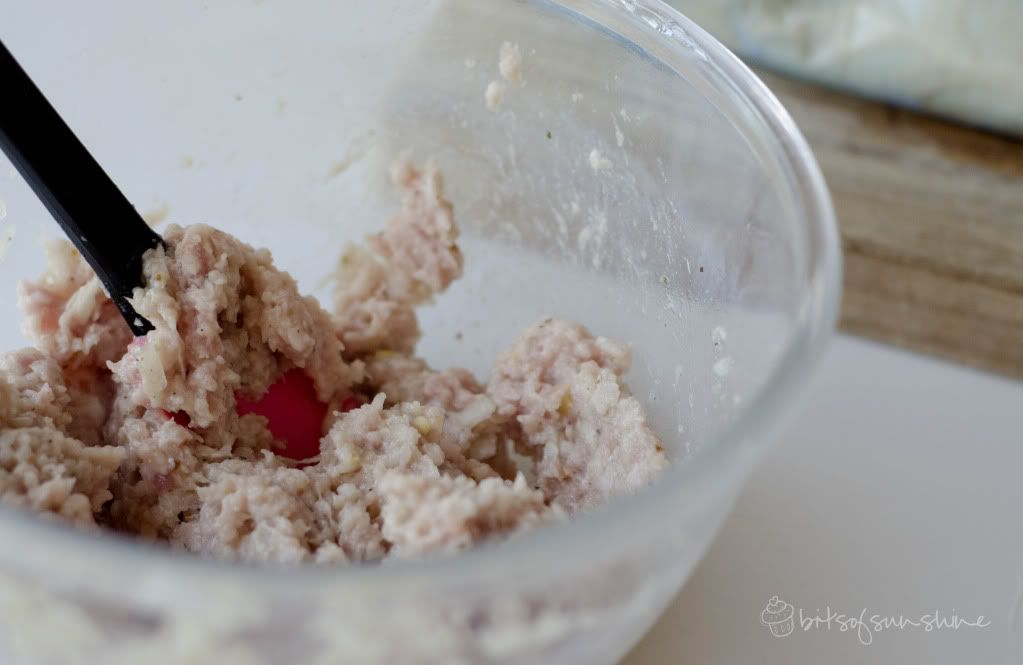
And mix em up real good!
Ok - so now its time for the pastry. I have a thing for pastry. The way it goes all yummy and crispy like.. mmmm, my oh my! If you are a regular reader of my blog - you will have noticed that I am a firm believer of making things from scratch - one of the few exceptions to this is puff pastry. I buy it ready rolled.I feel like its kind of like buying chopped veggies. :)
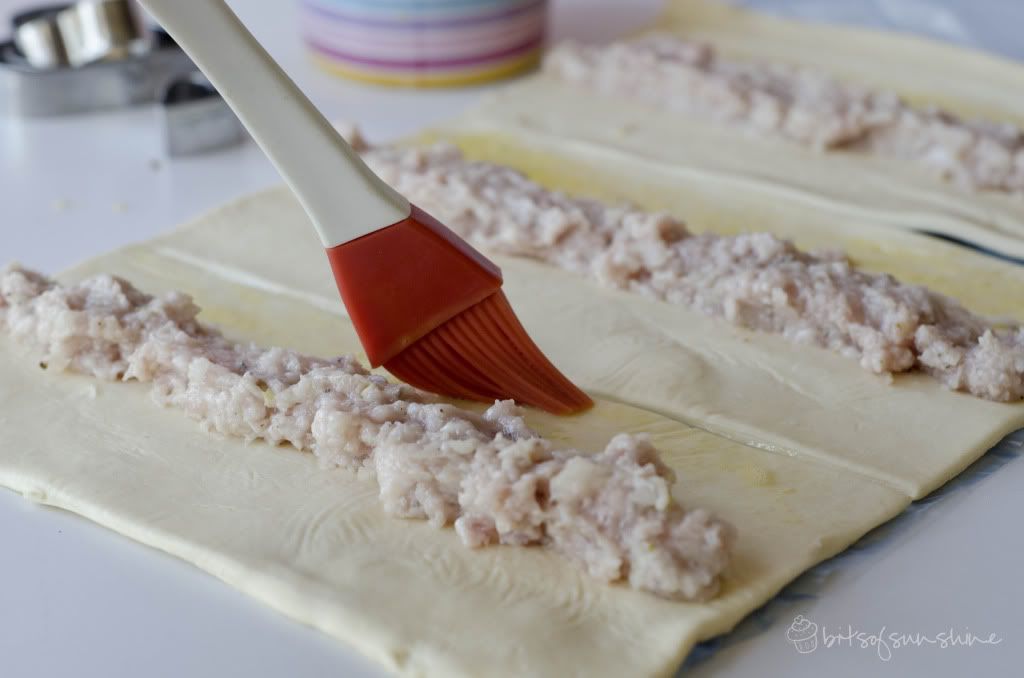
I usually buy the 400g "Today" pastry, it comes frozen and all rolled up, so I just take one out the freezer and let it defrost before unrolling it. The thickness of the pastry is totally up to you and what you would prefer, I like to use it the thickness it comes (it may have something to do with not having extra rolling to do - but I am not entirely sure), I guess its probably about 5mm thick. Here is where it gets sliced up width-wise so there are 3 pieces of pastry, about 12cm wide and about 20cm long (don't hold me to that - just an estimate!) Now its time to get our meat on! Divide the meat mixture into 3 portions and make a sausage of meat on each piece of pastry. DON'T make it to thick, or else you won't get the sausage rolls to close nicely! Then, lightly beat an egg an brush it onto one side of each of the pieces of pastry (you need this so the ends of the pastry will stick to each other - its like pastry glue) and then you can roll em up.

Start with the side without the egg and fold it in so it is covering the sausage meat, then fold the eggy side over so it folds egg side down. Then flip the long roll so the folded side is on the bottom. Confusing - I know - just look at the pictures :)
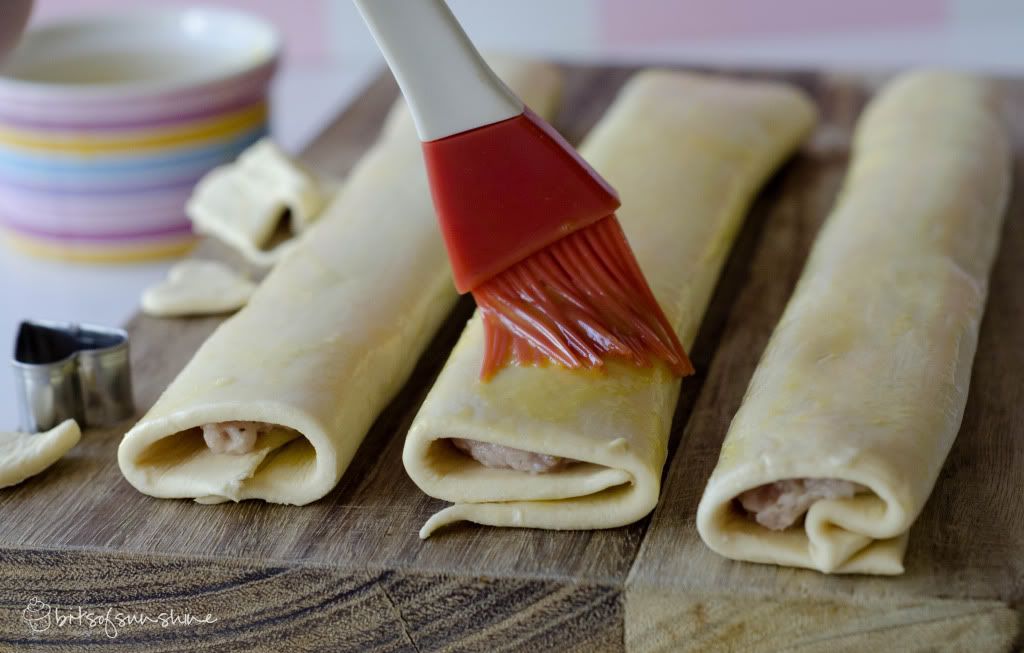
Brush the tops of the rolls with some beaten egg (you will probably have some left over from earlier). This makes them go gorgeously golden brown and extra crispy...

Grab a nice sharp knife and cut the long sausages into as many sections as you fancy - if they are for dinner, you can make them longer! I love making these for dinner, they are tasty and easy - and are great the next day for lunch! Once you have cut them up, poke some holes in the top of the pastry with a fork.
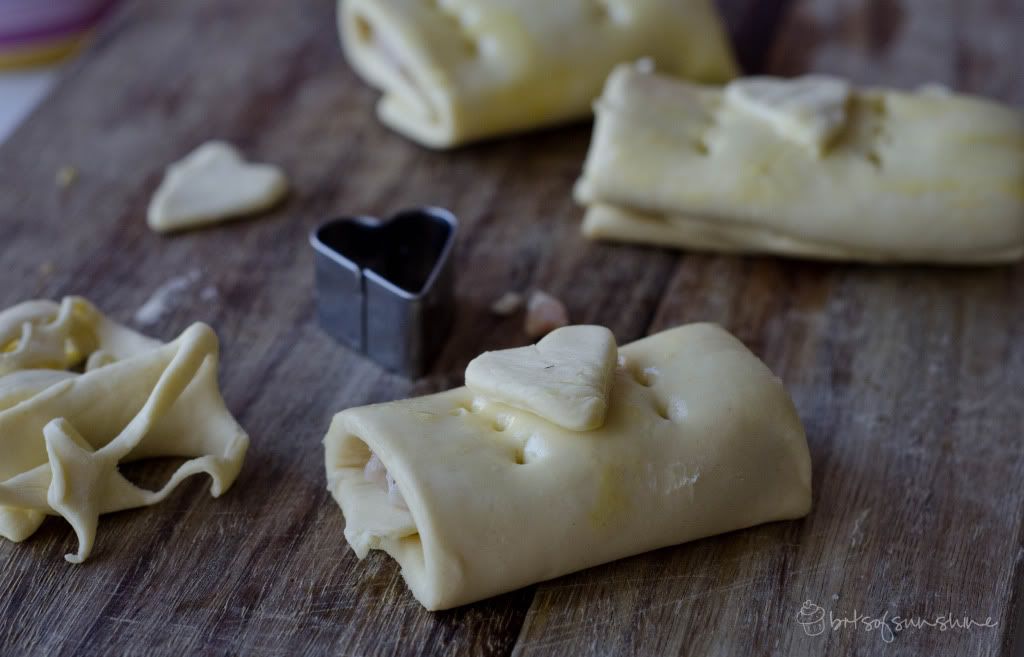
I like to keep a small strip of pastry for cutting out cute shapes and sticking them to the top of my sausage rolls. I am slightly obsessed with pretty food :)
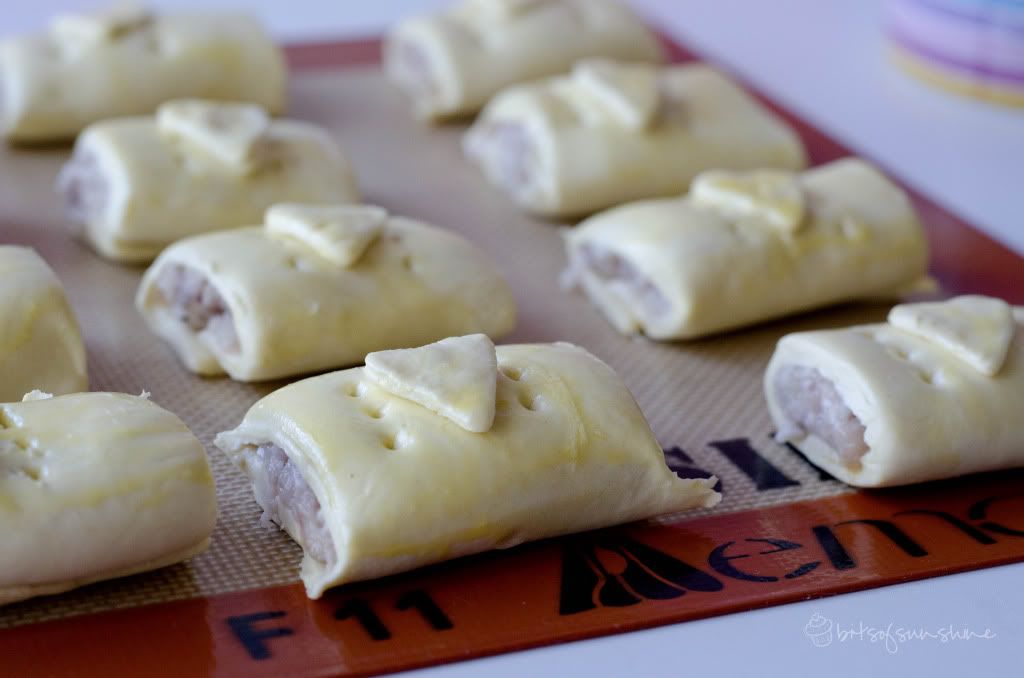
Pop them onto a greased baking tray and bake them for about 30 min, or until golden brown, at 180 degrees C (350 deg F). You may have to adjust the baking time depending on the size and thickness of the sausage meat. I find for the above thickness and size 30 min is perfect, just make sure they are nice and golden on the outside and the meat is cooked on the inside!
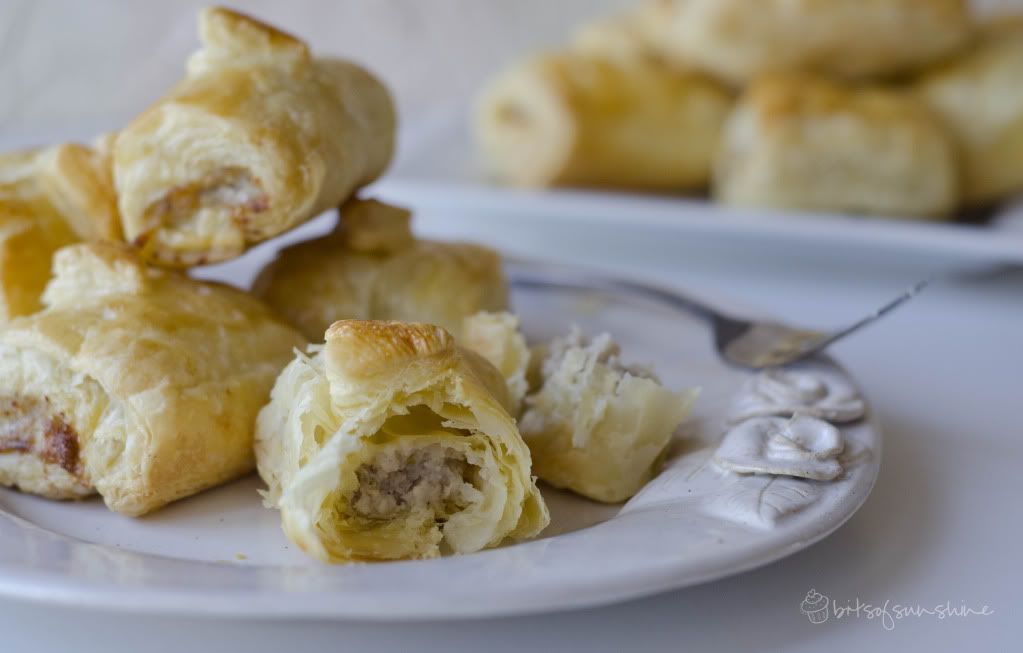
So there you have it! Hope you all enjoy it!I know Daisy was dying to!

She is always my baking buddy and usually is at my feet all the way - this time however - she had to get higher to see what that tasty smell was when they had finished baking. She is the very cutest! Too bad for little Daisy Dog, she didn't get get a crumb!
Homemade Sausage Rolls {Printable Recipe}

400g ready rolled puff pastry
375g pork sausage meat
1 small onion - chopped VERY finely
2 teaspoon mixed garlic and herb seasoning
1 lightly beaten egg
- In a bowl, mix the meat, onion and seasoning well. Set aside.
- Lay the pastry out on a cutting board and cut into strips of about 12cm x 20cm (or that kind of proportion).
- In the middle of each strip, lay a strip of the meat ( not too much or they won't close!)
- Brush one half of the pastry with the beaten egg
- Fold the unbrushed half of the pastry over the meat and then fold the brushed side of the pastry over that.
- Flip this long sausage over so the folded side is at the bottom
- Brush the top with egg and poke some holes in the top of the sausage roll with a fork
- Cut the long sausage into whatever size sausage rolls you would like
- Bake them at 180 degrees Cel. for about 30 min. They should be golden brown on the top and the sausage meat should be cooked through.
- Baking time may vary depending on the size and thickness.


