carlasconfections test: January 2013

Thursday, 31 January 2013

Custard Choc-chip Cookie Dough Cake Pops


Love is in the air. Seriously! Have you seen the number of Valentines Day goodies floating around all the food blogs lately? My gosh! I am still getting over Christmas! Just kidding. I love Valentines day, not really because I am hoping cupid will deem me worthy enough to shoot me with the arrow of love, but because the man I already LOVE MADLY was born on Valentines day! He is pretty much the best Valentines gift I could hope for, waking up next to him and making him a wonderful cake and scrumptious dinner does it for me! I know, soppy. But its true! Well others are planning to make valentines day goodies, I am planning a birthday cake. Cept Shane has pretty much narrowed that choice down. He adores Mozart Cake. I promise when I make it for him this year, I will share it with you guys!

But, I thought I had better join in the festivities, so I made these custard choc-chip cookie dough pops to share with you!


Its as easy as this: throw all the ingredients into your mixer bowl.


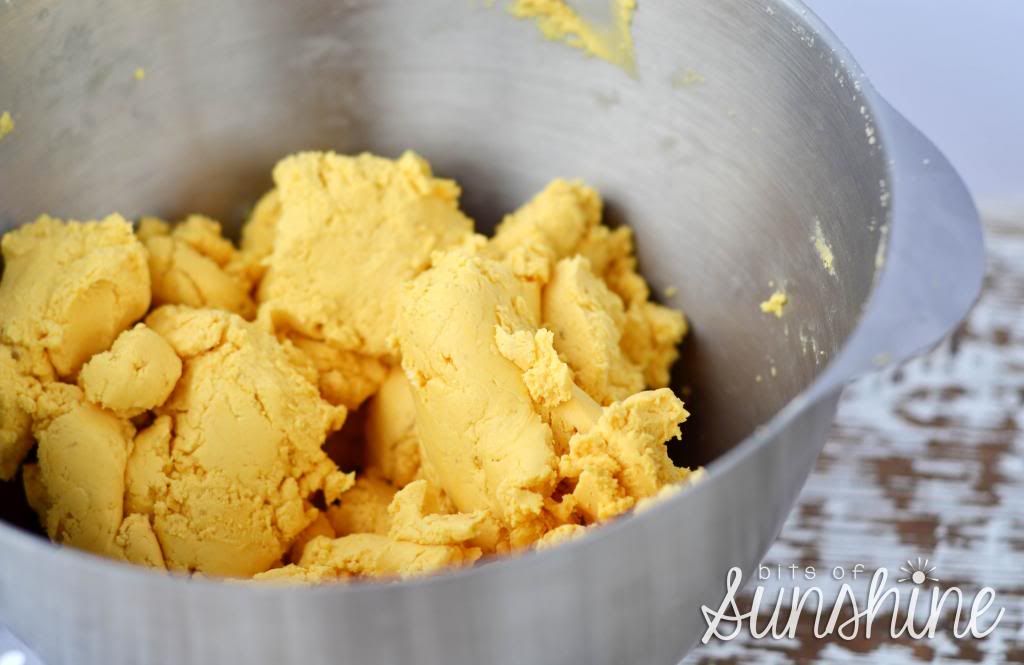
Mix until it looks like this. Then add 1 cup of chocolate chips and mix them all around.


Roll them into balls and dip them in some chocolate. If you want to see more about the dipping part - check out this post on condensed milk and shortbread cake pops. The only difference is: once rolled, pop them into the freezer for about 5 minutes, then dip the tip of a cake pop stick in some melted chocolate and push it about half way into the cookie dough pop. Then, pop them back into the freezer for about 10 minutes before your dipping begins. If you don't do this, the dough gets a little too hard to push the stick into.

That's all. Simple and sweet!


If you plan to make them, and share them, here are some cute Printable Valentines Day tags for you!


Custard Choc-chip Cookie Dough Cake Pops Printable

  • 250g butter
  • 1 cup icing sugar
  • 1 teaspoon vanilla essence (or ½ teaspoon vanilla extract)
  • 1 cup custard powder
  • 2 ¼ cups flour
  • 1 cup chocolate chips
  • chocolate or candy melts for dipping
  • valentines day sprinkles

Combine all the ingredients together, starting with the wet ingredients and adding the dry ingredients Mix until a firm dough is reached
Add the chocolate chips and mix well
Roll into balls
Pop into the freezer for 5 minutes
Dip the tip of  a cake pop stick in some melted chocolate or candy melts and insert it half way into the dough ball, do this to all the dough balls
Pop them back in the freezer for 10 minutes
Dip the cool pops in some chocolate or candy melts
Decorate with some Valentines day sprinkles

www.bitsofsunshine.com © Heidi Hawyes


Sunday, 27 January 2013

Part Two - Lenses


I am going to say from the very beginning, this whole series is based on my own experience. I am, by no means a professional when comes to all the technical jargon, nor have I been on any photography courses. All that I have shared, and plan to share, is based  on my own experience. Just letting you know! :)

If you missed last weeks edition, it was pretty much just an introduction along with a photography challenge. For those if you who asked, I promise I will get to shooting in manual later in the series and I will try and explain it all in easy-to-understand terms, so keep your eyes peeled for that one!

Lenses! So what's the big deal?


Well, actually - they are a big deal. In some cases they are more of a big deal then the body they are attached to. I know - I sound all high and mighty saying that, like I am some type of expert! I am SO not! Really! SO - having said that, all I am going to write in this post, is the little I know about the lenses I have used and why I love them!

There are so many makes, types and qualities to choose from when it comes to buying a lens. You may think at this point, why buy a new lens at all, why can't I just use the lens that came with my camera when I bought it? Good question! See that big lens in the photo, the Nikon one? Well, that is the 'standard' lens that came with my Nikon D7000. It is a AF 18-105mm F/3.5-5.6 VR lense. Don't let all the letters and numbers freak you out! I will break it down for you!

Let's start with the Nikon 18-105mm then I will get to the other two...

18-105mm part is the focal length. Pretty much means this lens is a versatile, it has a nice wide angle when is it at 18mm...


and it zooms in so you can get cool close ups at 105mm...


Ok, got that? Moving on to the next thing - the f numbers. This, in very basic terms, has to do with the size of the opening of the iris of the lens, aka - how much light the lens is able to let in. Like if you have a tube and you stick a piece of paper at one end and poke a tiny hole in that paper - that is the lens opening. If the hole is big, it lets more light in. If the hole is tiny, it lets less light in. Remember here too, this is connected to the depth of field ie. the amount of picture that is in focus, but I will get to that a bit later in this post. The confusing thing here is:

The BIGGER the f number, the SMALLER the opening, the LESS LIGHT, the LESS blur.

The SMALLER the f number, the BIGGER the opening, the MORE light, the MORE blur.

The F number is actually a fraction, that is why this happens. For example 1/2 is bigger than1/8, in the same way f2 is bigger than f8. So I hope that explains that!

ALSO - in the same light (ha ha), with zoom lenses like my 18-105mm and most entry level zoom lenses, the f number will change as you zoom in and out. for example, with this lens:

The maximum aperture changes with focal length about as follows:

18mm - f/3.5
24mm - f/4
35mm - f/4.5
50mm - f/5
70mm - f/5.3
85mm-105mm - f/5.6

So as you zoom in the maximum aperture goes down, so you will get less light.

Moving on to AF. AF means it is an auto focus lens, which means it can focus on its own by pressing the shutter release button half way, but you can set it so you can focus manually. I have only really used the auto focus function. I have never played around much with manual focus - so I can't really comment on it.

And last, but certainly not least - it is a VR lens, meaning vibration reduction lens. That is the Nikon version - I think Canon calls it IS - image stabilisation. It means that the lens reduces hand shake - A VERY cool feature, especially in low light when your shutter spead is low. it helps to keep your images sharp and stops that smudging effect that you sometimes get when you're not using a tripod.

Ok - that is my 18-105mm lens explained. BUT this is not the lens I use to take my food photos. I usually use this lens as my 'holiday' lense. Like for multipurpose stuff - like beach and fun and stuff like this:


(This was how we spent our December holiday! Sun, surf and fun!)

Anyhoo - back to photography! 

All things light and f stop-py are so dependent and mashed with the concepts of aperture, shutter speed and ISO, you can't really explain one and not the others, so don't worry if you are battling to grasp this. As this series progresses, this will start making sense! We are kind of just finding the corners and building the sides and when we start filling in the puzzle pieces, you will start seeing the picture! :)

Ok - so now for the good part - the food photography part! That tiny lens in the picture, that is my 50mm f1/8 aka fantastic plastic or thrifty fifty! And its the lens I use for 98% of my food shots!

There are two things that make this lens fantastic - it has a low f stop number which creates stunning blur, and it is one of the cheapest lenses you can buy - for Canon and Nikon and other cameras I suppose!

The middle size lens is my Tamron 17-55mm f2/8, also a very cool lens. I will show you why I love these two over the 18-105mm...


This was taken with my 50mm.Clean, sharp and gets nice blur.

I love my 50mm. REALLY. It colours are so vibrant and bright and realistic. I would recommend that if you do not own this lens yet, that you research it and see if you can get it for your camera. It makes the world of a difference. I mean - check this out-


This was taken with my 17-55mm at f/2.8 (stunning blur hey!!) vs


this - taken with my 50mm at f/2.8. The 50mm seems to capture more 'true to life' colours.


This was taken with my 50mm at f/4.5 - see how the blur has decreased and the places not in focus has become a little clearer with. Yip - that is basically the whole depth of field thing I was talking about earlier - which I will go into detail when we get to aperture.

Just a note here on the 17-55mm f2/8.  It is a zoom lens just like the 18-105mm, it is just a better quality lens, with better quality glass inside which allows it to keep a fixed aperture. So unlike the 18-105mm lens, the f number won't change as you zoom. So bear that in mind if you are looking for a fast lens with zoom. Always try and get the best quality as possible, it effects the picture quality and other features.


So after ALL of that - what I really wanted you to get out of it was:

Get a nice prime/fixed focal length lens with a low f number, like a 50mm f1/8 or 50mm f1/4 for your food photos!

And if you are still confused, just keep reading this series! We will get to all those confusing bits and pieces!

See you next week for some tips on light and back drops!

Wednesday, 23 January 2013

Chocolate Rolo Brownies


I think I just found the perfect brownie. I wouldn't say so if it weren't true. Its true. Try it and see.

I won't even say anything more. Just try it. Ok?!

Chocolate Rolo Brownies Print

  • ¾ cup butter
  • 2 cups white sugar
  • 1 cup cocoa
  • ½ teaspoon baking powder
  • 1 teaspoon salt
  • 3 eggs
  • 1 cup flour
  • 1 cup chocolate chips
  • 1 tablespoon vanilla essence
  • 1 ½ cups of rolos
place butter, sugar and cocoa in a in a heavy based pot
place on a medium heat and stir until butter has melted
remove from heat and add baking powder, salt and eggs
stir the mixture until it is glossy
add the flour and mix until combined
stir in the chocolate chips and rolos
pour mixture into an oven proof dish
bake in a preheated oven at 160°C/320°F for 25 - 30 minutes
dust with icing sugar

www.bitsofsunshine.com © Heidi Hawyes 2013

Wednesday, 16 January 2013

Part One - Photography Challenge

Since you have all been asking for this - here it is! 


I am going to say from the very beginning, this whole series is based on my own experience. I am, by no means, a professional, nor have I been on any photography courses. 

My whole DSLR camera experience started one and a half years ago. My husband bought me my first 'big girl' camera for my birthday and I was totally over whelmed by all the dials and settings and things like ISO and aperture and shutter speed!!!! I was clueless and had no idea where to start. If you have just received a camera for Christmas - lucky you :) - and feel the same way I did - GREAT - This series is just for you! Or even if you just need tips and tricks on home-shoot set ups or back drops - keep checking back! 'Cause I plan to cover it all :) - I know just how frustrating it all can be and I hope that you can get as much joy out of your camera as I get out of mine!

SO this is what you can look forward to over the next few weeks...


And this being the first in the series, I would like to introduce you to my camera: the Nikon D7000


Gorgeous hey!


I am super impressed with this camera! It has 39 focus points which is bliss! And it handles low lighting situations so well! I wont give you any tech specs - you may nod off to sleep before I get to the good stuff, but this is such a nice camera. If you are considering a DSLR, I would really recommend this one. Its perfect for beginners as it is in the price range of entry level cameras but has the quality and control of the more professional cameras!


Anyhoo - enough about my camera - let's talk about yours! 

Taking good pictures is a combo of things: how well you know your camera, how much you understand about the camera settings (and stuff like that), your lighting, your subject & setting and your ability to compose a good lookin' picture! And the truth is - most of those things are TOTALLY in your control! In fact the only one that could be a problem is your creativity in composure - but the more you do it, the better you will become. For example:
This 'improvement' took 1.5 years. Yes. That is the sad news! The good news is that if you follow this series *hopefully* you can learn from my trial-and-error-process and speed up your journey to good photos. Having said that - I have to add - the fun is in the journey, so buckle up and enjoy it!

The very first thing I did was read my manual from cover to cover. Boring - I know, but it was probably the best thing I could have ever done! I went from not knowing anything to being able to use my camera. I suggest you do the same. Go and dig out your manual, grab your camera and sit in a comfy chair for the afternoon and get cosy with your camera. I promise it will be worth it. You may find as you go through it - some things are in geek-talk, don't panic, just pick up your camera and see the 'real life' thing they are trying to explain. And if even after picking up your camera you  have no idea what point the manual is trying to get across - don't yell and throw the manual across the room, just move on to the next thing. After you have been through it once it is time to practice!!! 

Practice makes perfect, it will also make sense. Sense of all the camera-geek talk. The more you use your camera, the more you will understand your camera. I spent the first few weeks of getting to know my camera the old school way - on the manual setting. I read and re read that section in my manual until I felt confident enough to start snapping away. It was a little frustrating at first, but once I got the hang of it I totally understood exposure and shutter speed - vital aspects of photography. And then I literally snapped away at everything that I could! I was so happy to have a sweet little model to practice motion shots on and of course I had lots of baking to play around with. 

You should do the same! Really!

So what do you think of this? A photography challenge! 30 days of photos. Come on - it will be fun! 


Use this as a guide to spark your imagination. I would love to see what you come up with, so please post your photos on instagram or twitter with the #P4Fpink or day #P4Ffruit etc, or to facebook and tag me in! Or just leave a link in the comments! I cant wait! Plus - I will get to know you, 'cause i can follow all your photos - bonus for me!

To download this as a handy print out to stick in your camera bag - go here.

If you want to do this only when the series ends - feel free to do that - or jump right in!

Can't wait to see your photos! 

Sunday, 13 January 2013

Chocolate Kit-Kat Ice Cream

You want to know something strange? Ok..did you know that Kit Kit holds the Guinness World Record for the chocolate bar with the greatest number of variants (2013). Want to know how many varieties there are? 120! Yip - and those include cucumber, wasabi, watermelon and salt. Wow hey!!! I can totally understand why people make so many varieties (ok - maybe NOT why they made a cucumber flavourthough?!?!). Kit Kats are pretty awesome. That is what inspired this...


I am not sure if I told you , but I recently acquired an ice cream maker through an exercise rewards programme. Don't ask. Anyhoo, I ADORE it. If you are on the edge of making the decision of buying or not buying an ice cream maker - I say BUY one. I am so pleased with mine. I bought a Krups GSV1 - its nice because I can store the bowl in the freezer and when I feel the urge to eat ice cream I can whip up a batch in half an hour. Pretty snazzy if you ask me!


As far as ingredients go, they are pretty simple! To make roughly 1.5 litres I use 250ml heavy cream, 500ml milk, 3/4 cup cocoa and a little boiling water, and 1/2 cup of white sugar and what ever extras I feel NEEDS to go into the mix. According to my absolute-ice-cream-hero - David Lebovitz, ice cream that uses eggs to make a custard based ice cream are far more tastier then the plain milk variety, so just keep that in mind. I however try and skip the use of eggs where I can - they are not my favourite when it came to texture and flavour. This recipe has gotten me thinking more and more about trying an egg based ice cream - so watch this space!

Woah - I just got so side tracked - back to the ice cream making!

I used 3 of the 120 flavours of Kit kat - milk, dark and white - just for a treat. I chopped it up into good sized chunks and then set it aside. Then I prepared the cocoa mixture.


To make the cocoa mixture, I mixed 3/4 cup cocoa with as much boiling water as I needed to make a loose, smooth paste. I then added this to a bowl that I hada mix of the milk, cream and sugar.

Once all of this is mixed up - it needs to chill. I mean really chill. Like for the afternoon.

Once its chilled its time to get churning - no not you! - your ice cream maker!


You have to have everything ready and waiting so when you get the bowl out of the freezer you are raring to go. You also have to have the machine already running and churning so when you pour the mixture into the bowl it doesn't freeze in clumps as it hits the ice cold bowl.


After 25 minutes of churning - this is what I got. EEEEEPPPPP!!!!

Now for the good part - dumping all that chocolate into this!


After it got all mixed it, I popped it into a loaf pan and popped it into the freezer to harden slightly.


And then it was time to enjoy! Yey!


Easy as, er, ice cream I guess!


Good enough to eat for breakfast!

Chocolate Kit Kat Ice Cream Printable


250ml heavy cream
500ml milk (you can use 2%)
3/4 cup cocoa and enough boiling water to make a smooth paste
1/2 cup sugar

make a paste with the cocoa and water
mix all the ingredients together and chill
once chilled place in your ice cream maker and make according your ice cream makers instructions

once ice cream is churned add:

3 bars of chopped up kit kat

and mix together before popping into freezer to harden.

Enjoy!

www.bitsofsunshine.com    (c) 2013 Heidi Hawyes
Blogging tips